Google Drive and Blendspace (formely known as Edcanvas) have become two of my absolute favorite educational technology tools in and out of the classroom. They are both very effective tools for 'flipping' the classroom, albeit in slightly different ways. Google Drive is fantastic for creating documents and presentations that students can work on together in real-time. There is no longer any need for student groups to huddle around one computer when working on a project. They can now all access the same file from their own computers 24/7 from any location, be in at school or at home. Google Drive, in addition, allows teachers to store worksheets, PDFs, presentations, or any other document in the 'cloud' that can be shared with students in a zip. On several occasions this year, I have had students message me saying that they accidentally forgot their homework at school. In seconds, from any device, being my computer, IPad, or IPhone, I sent them the homework without even composing an e-mail. It is a magnificent resource to have in these tricky situations.
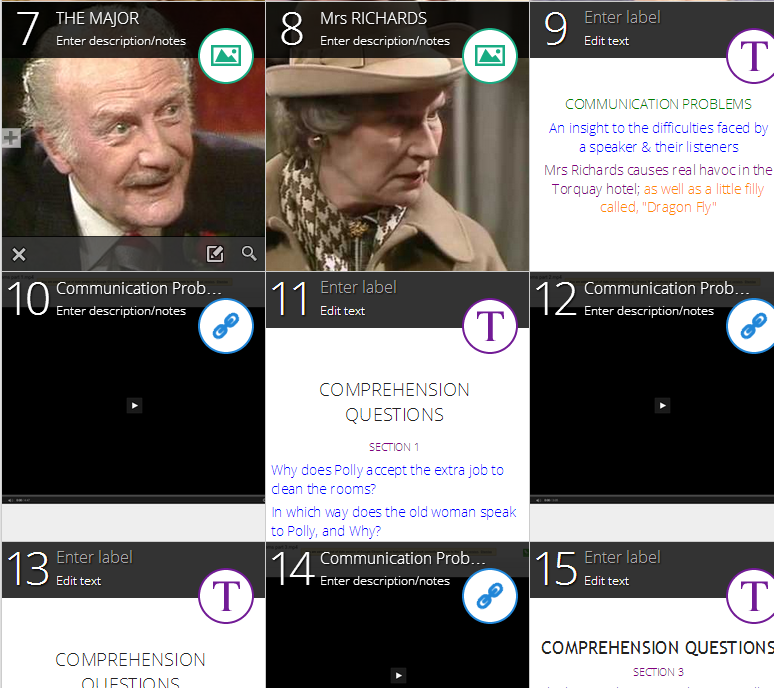
Blendspace, on the other hand, isn't for collaboration, but rather an excellent tool for 'flipping' your lessons. You can edit text, upload images and documents (provided they are less than 1 mb), link to Youtube videos, and import anything from the web (including your Google Drive files) all into one Blendspace tutorial. Once your lesson is made, you simply share the URL with your students on your PLN, like Edmodo, or send it to them via e-mail. From there, your students can access the tutorial, again, 24/7 from any computer.
The purpose of this post, however, is more specific than just mentioning these two useful websites for education. It is about how we can make short videos, even copyrighted ones, more accessible and effective for our lessons, and these two ICT tools can help accomplish that in just a few steps.
Using videos in lessons is certainly nothing new in the ELT world. It has been used for decades. The difference today, though, is that with all of the technological tools at our disposal, particularly Youtube, we no longer have to show entire films or television programs in the classroom and waste precious teaching time. We can just find any short video we want on the web, and show it to the class. For many teachers (myself included), however, there are several shortcomings with always depending on Youtube to make visual-learning lessons.
To begin with, many schools around the world have restricted teachers and students from using Youtube to prohibit watching videos with inappropriate content while on campus. Even worse, in Turkey, where my colleague and I work, the government has recently taken more control of internet access to control information it deems provocative, so Youtube is constantly being blocked. And although Youtube is undoubtedly an amazing resource for education, the problem we face constantly is the copyright infringement policies on the site. For example, as mentioned above, we no longer have to show entire films to our students. With ICT trimming tools, we can cut the best scenes from any film or television program to make an engaging resource to use in class for listening, discussions, or prompts for writing. The problem, of course, is that Youtube won't allow you to upload these trimmed scenes due to copyright, even though we are only using it for educational purposes.
Now, with Google Drive and Blendspace, we can easily get around these obstacles to show any short video we want in just a few steps...
Step 1: Open your Google Drive account, and click the 'upload' button on the left side of the screen. Click 'Files', locate the video on your computer, and then click 'open'. Conversely, you can simply drag and drop the video file from your desktop.
Step 2: Tick the box of the video, and click 'share'.
Step 3: A box with the URL will appear. Copy the link, and make sure that the settings is on either 'anyone who has the link', or 'public on the web'.
Step 4: Now, sign into Blendspace, and either create or open a saved tutorial that you wish to add the video to. Once opened, click the blue 'world' button at the bottom right of the screen, paste the video's link into the box, and then click the magnifying glass next to it.
Step 5: The video file's name will then appear just below the box. Drag and drop it into any of the empty boxes.
Step 6: Your video will then appear in the box.
This method of sharing and teaching with videos has been a revelation for us, so much so, that very soon were are intending to purchase more cloud space from Google Drive. You can buy 100 GB of space for only 1.99 dollars a month. That is an absolute bargain for the power of being able to control and share your videos and other files. You no longer have to worry if the Youtube videos you want to use have been removed or deleted due to copyright or other issues.


.png)


.PNG)
.PNG)


